A well-configured chatbot can radically transform your marketing performance: more qualified leads, higher conversion rates, visitors guided through your funnel around the clock. But how do you actually install one without writing a single line of code? This step-by-step guide takes you from strategy to launch.
Why chatbots have become an essential marketing tool
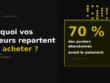
As a marketer or growth hacker, you know every visitor counts. Yet the majority of your traffic leaves without converting, not because your offer is weak, but because nobody is there to answer the right question at the right moment.
A conversion-focused conversational chatbot changes the equation on three levels:
- Automatic lead qualification: the chatbot asks the right questions and segments visitors in real time, before they even fill out a form
- Instant nurturing: it guides each prospect based on their intent level, without waiting for human intervention
- Actionable data: every conversation generates insights on objections, frequently asked questions, and friction points in your funnel
And the good news for non-technical marketing teams: the best tools on the market can be installed today with zero code, in under 30 minutes.
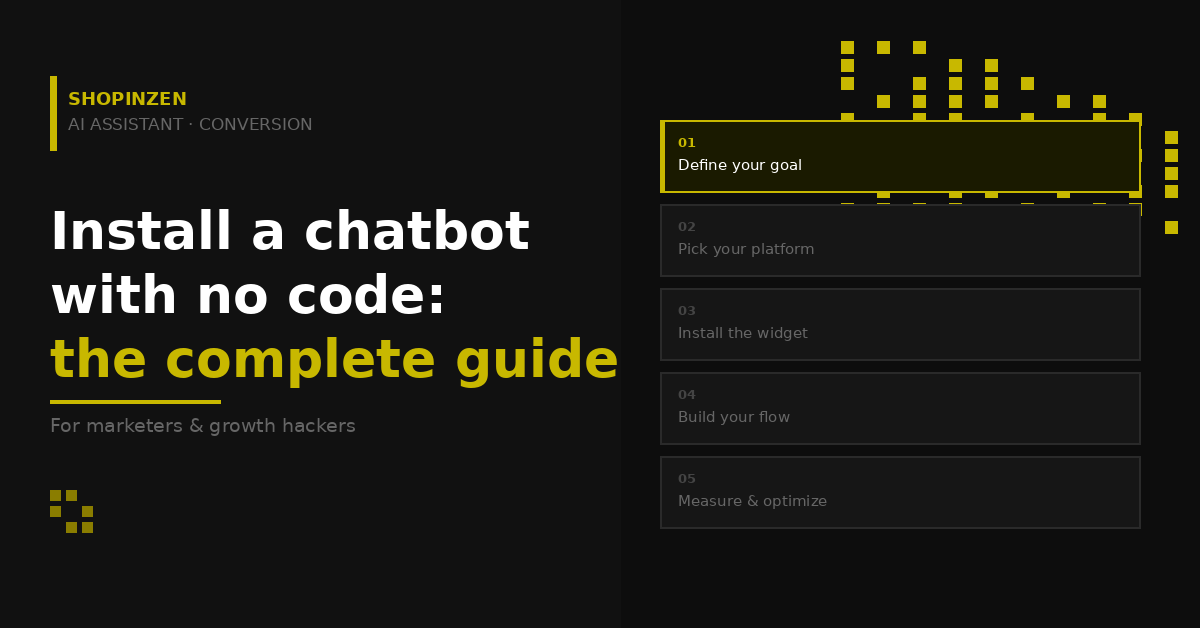
Step 1: Define your chatbot’s goal before configuring it
This is the step most marketers skip and the main reason so many chatbots underperform. A poorly targeted chatbot is a useless chatbot.
Ask yourself these three questions before you start:
- What is the main obstacle to conversion on your site? (product hesitation, lack of information, a process that’s too long…)
- What action do you want visitors to take? (book a demo, sign up, buy, download…)
- On which pages should your chatbot appear? (homepage, landing pages, product pages, pricing page…)
A chatbot with a single, clear goal (for example, « qualify leads on the Pricing page ») will always outperform a generic assistant deployed across the entire site.
Step 2: Choose the right platform
For a marketer who wants to move fast without depending on technical resources, the key criteria are: plug & play installation, a visual scenario builder, native CRM integrations, and a freemium model to test without risk.
Shopinzen checks all those boxes. Built from the ground up for conversion (not just customer support), it lets you create complete conversational flows from an intuitive visual interface, from welcoming the visitor all the way to lead qualification or purchase completion.
Additional advantages for marketing teams:
- Configurable behavioral triggers (time on page, exit intent, scroll depth…)
- Compatible with all CMS platforms: WordPress, WooCommerce, Webflow, custom sites
- Multilingual and GDPR-compliant, secure hosting in France
- Free access with no credit card required to get started
Step 3: Create your account and install the widget
Once your Shopinzen account is created (under 2 minutes, no credit card), installing it on your site takes three actions:
- Copy your snippet from the Shopinzen dashboard, it’s a simple JavaScript block generated automatically
- Paste it into your site’s <head> on WordPress, via the « Insert Headers and Footers » plugin or directly in your theme settings; on Webflow, via the page settings; on any other CMS, in the « custom code » section
- Verify the display by visiting your site in a private browsing tab
No plugin to configure, no technical dependency. The widget appears instantly.
Step 4: Build your first conversation flow
This is where the magic happens and where your marketing expertise adds real value. Shopinzen’s visual editor lets you build conversation trees using drag and drop, with zero technical knowledge required.
Recommended structure for a first lead generation flow:
- Opening message (triggered after 10 seconds on the page): « Hi there 👋 Looking to [main benefit of your offer]? »
- Quick qualification (1 to 2 questions max): « Are you more of a [option A] or [option B] type? »
- Personalized response based on profile: route to the right content, offer, or CTA based on the answer
- Contact capture: « To receive [your resource / offer], drop me your email 📧 »
- Confirmation & next step: thank you message + link or next action
Growth tip: always test two variants of your opening message (A/B test) to identify which one drives more engagement. Shopinzen lets you measure the performance of each flow directly from the dashboard.
Step 5: Configure smart triggers
A chatbot that appears at the wrong moment feels intrusive. A chatbot that appears at the right moment feels helpful. The difference comes down to triggers.
Here are the most effective triggers by use case:
- Pricing page → trigger after 20 seconds: « Questions about our plans? I can help you choose 💡 »
- Product page → trigger on exit intent: « Before you go, any questions about this product? »
- Campaign landing page → trigger immediately: message aligned with the ad’s promise
- Blog page → trigger after 50% scroll: offer a related piece of content or a downloadable resource
Step 6: Connect your chatbot to your marketing stack
An isolated chatbot captures leads. A chatbot integrated into your stack turns them into opportunities. Shopinzen integrates natively with the leading marketing tools to automatically send collected data to your CRM, email platform, or automation tool.
Integrations to prioritize:
- CRM (HubSpot, Salesforce, Pipedrive): every qualified lead automatically creates a contact with their data and profile
- Email marketing (Mailchimp, ActiveCampaign, Brevo): contacts are added directly to your nurturing sequences
- Analytics (Google Analytics, Plausible): track conversation events as micro-conversions
Step 7: Measure and optimize
A chatbot isn’t a set-it-and-forget-it tool. Key metrics to review every week:
- Engagement rate: what percentage of visitors interact with the chatbot?
- Completion rate: how many complete the flow all the way to the final CTA?
- Lead conversion rate: how many leave their contact details?
- Drop-off point: at which step of the flow do visitors disengage?
Golden rule: if your completion rate is below 40%, shorten the flow. Visitors abandon long conversations. Aim for 3 to 5 exchanges maximum before the CTA.
Conclusion: your chatbot can be live today
Installing a conversion-focused chatbot requires no developer, no significant budget, and no weeks of configuration. With Shopinzen, you can go from zero to a fully operational conversational assistant in under an hour and start measuring the impact on your conversions the very next day.
For marketing teams looking to get more from their existing traffic without increasing acquisition budgets, this is one of the fastest and most cost-effective levers available right now.
Ready to deploy your first chatbot? Create your free account (no credit card required) at shopinzen.com.
This article is for informational purposes. Features and integrations mentioned are subject to change, check Shopinzen’s official documentation for the latest updates.